

Creating and Managing Incidents
An operational problem is easiest to solve when it is recorded while the details are still clear. Incidents help your team capture the event, put it in the right context, and make ownership visible from the start.
The creation form guides the reporter through the information your organization needs, while the details panel keeps comments, attachments, responsibility, and progress together.
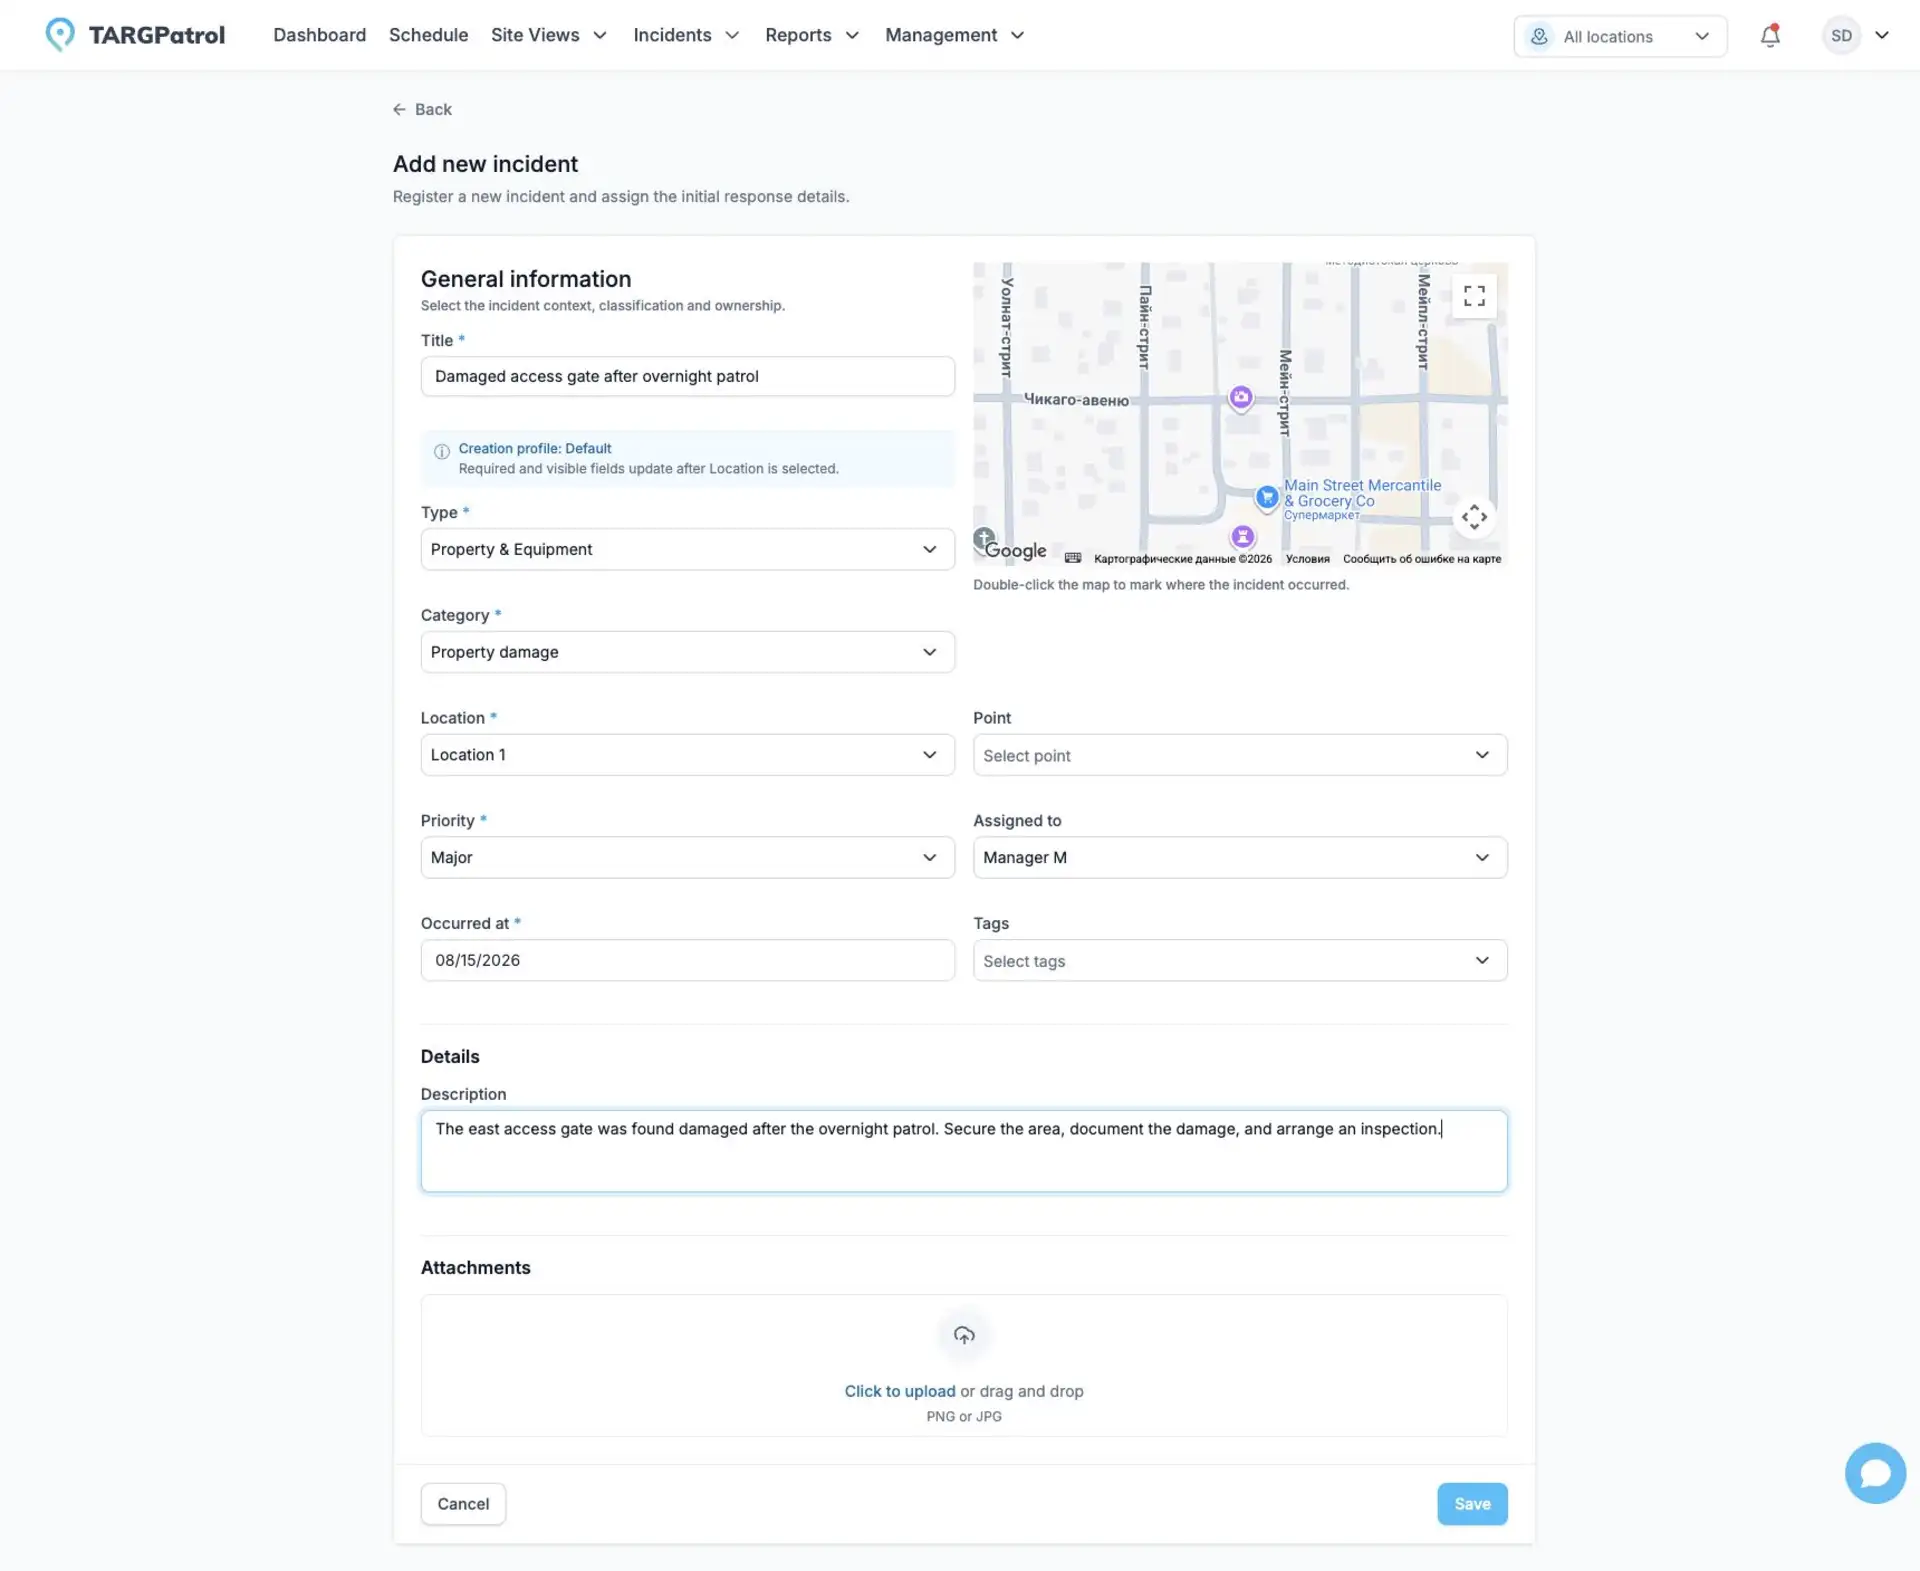
The Incident form captures classification, location, priority, assignment, time, description, and supporting evidence in one place.
Watch the complete Incident Management overview to see the full process, from configuration and reporting to Kanban, Analytics, and exports.
See it in practice
A guard finds an emergency exit blocked by stored equipment. They create an Incident, select the appropriate Type and Category, choose the Location, add a photo, and set a high priority. The safety manager can immediately review and assign the work.
As the obstruction is removed, the team adds a comment and completes the allowed transition. The Incident now tells the complete story without relying on separate messages.
Good to know: the fields you see during creation may be simplified or prefilled according to your role and Location. TARGPatrol still records the Incident in the configured initial state automatically.
Before you start
You need access to the selected Location.
At least one active Type and Category must be available.
The Incident workflow must have an active initial state.
Your account must have the permission required for the action you want to perform.
Create an Incident
Open Incidents from the main menu.
Select Add incident.
Enter a title.
Select a Type and then a Category. The Category list is limited to the selected Type.
Select a Location and, if applicable, a Point.
Choose a priority and occurrence date and time.
Optionally select an assignee, add tags, and enter a description.
Select Save.
TARGPatrol assigns the configured initial state. You do not choose the state during creation.
Report Incidents from the mobile app
Open Incidents in the mobile app to create a standalone report, or use the Incident reporting action while performing a task. Complete the fields required for your role and Location, add supporting photos or videos, and save. Location access, creation permissions, and the organization’s module settings still apply.
Prepare for offline reporting
Before going offline, open the organization while connected and check that Incident creation configuration is available for the Locations you will visit. The app needs this cached configuration to show the correct form. If a Location is unavailable, reconnect and refresh the configuration status. A first visit to an uncached Location cannot be prepared without a connection.
When you save a new Incident offline, its details and media remain on the device in the local queue. Saved locally does not mean sent: managers will see the report only after it synchronizes. Keep the app and its local data until synchronization completes; deleting the app or clearing its storage can remove unsent records.
The app sends queued Incidents when connectivity returns. Review the local queue to confirm the result. If an item needs attention, open it, read the message, correct the draft if needed, and retry while online. Configuration or access changes may require you to review the report before it can be sent.
Offline support covers creating and saving new Incidents locally. Editing an Incident already stored on the server and requesting its PDF require a connection. Do not treat offline creation as offline access to every Incident action.
Find and review Incidents
The Incidents page supports table and workflow views. Use search and filters to narrow the list by Type, Category, state, priority, Location, assignee, and date. Category becomes available after you select one or more Types.
Select an Incident row or View details to open the details panel. The panel shows classification, responsibility, dates, description, tags, attachments, state actions, comments, and transition history.
The mobile map also shows accessible Incidents with location coordinates, helping field teams find reports by place. A locally queued report is not yet a synchronized report for other users.
Edit an Incident
Open the Incident details.
Select Edit.
Update the available fields and select Save.
The state is not edited with the general Incident fields. Use an allowed workflow transition to change it. Existing Incidents can retain archived Types, Categories, or states, but archived values cannot be selected as a new value.
Review changes to an Incident
In the Incident details or edit view, open History. Changes shows creation and supported field edits; Transitions shows workflow movements and transition notes. Expand a change to inspect its details. Comments are separate from both views.
Incident State Changes and History
Comments and attachments
Use Comments to share updates with other users who can access the Incident. Mention a user when you need to draw attention to a comment.
You can attach images and supported documents from the web interface. An Incident can contain up to 10 attachments. Existing attachments are displayed in the Incident details and edit page and can be removed by an authorized user.
To save a copy of one Incident, select Export PDF. To download all files attached to the Incident and its comments, select Download all attachments for a ZIP archive. Both actions are available on Base and Enterprise and unavailable on Free. The ZIP action requires at least one attachment. For detailed steps, see Incident Reports and Exports.
To export several selected Incidents as one PDF or a ZIP of individual PDFs, see Incident Reports and Exports. The limit is 25 Incidents per export.
Assign responsibility
Select an active user who has access to the Incident Location. If no assignee is selected, the Incident remains unassigned. Creation forms can provide a default assignee or make the field read-only for a specific role or Location.
Troubleshooting
A Type or Category is missing: it may be archived, or the Category may belong to another Type.
A Point is missing: select its Location first and verify that the Point belongs to that Location.
An assignee is missing: verify that the user is active and has access to the selected Location.
A state action is unavailable: your role may not be allowed to use that transition.
With the basics in place, your team can spend less time deciding how to record an event and more time resolving it.
Related guides
Incident State Changes and History
Related reporting
After Incidents are registered, analyze and export them with Incident Reports and Exports.