

Configuring the Incident Workflow
A workflow should answer two simple questions: what is happening now, and what can happen next? Incident states make progress visible, while transitions make sure changes follow your organization’s process.
You can start with a small workflow and expand it later as the team gains experience.
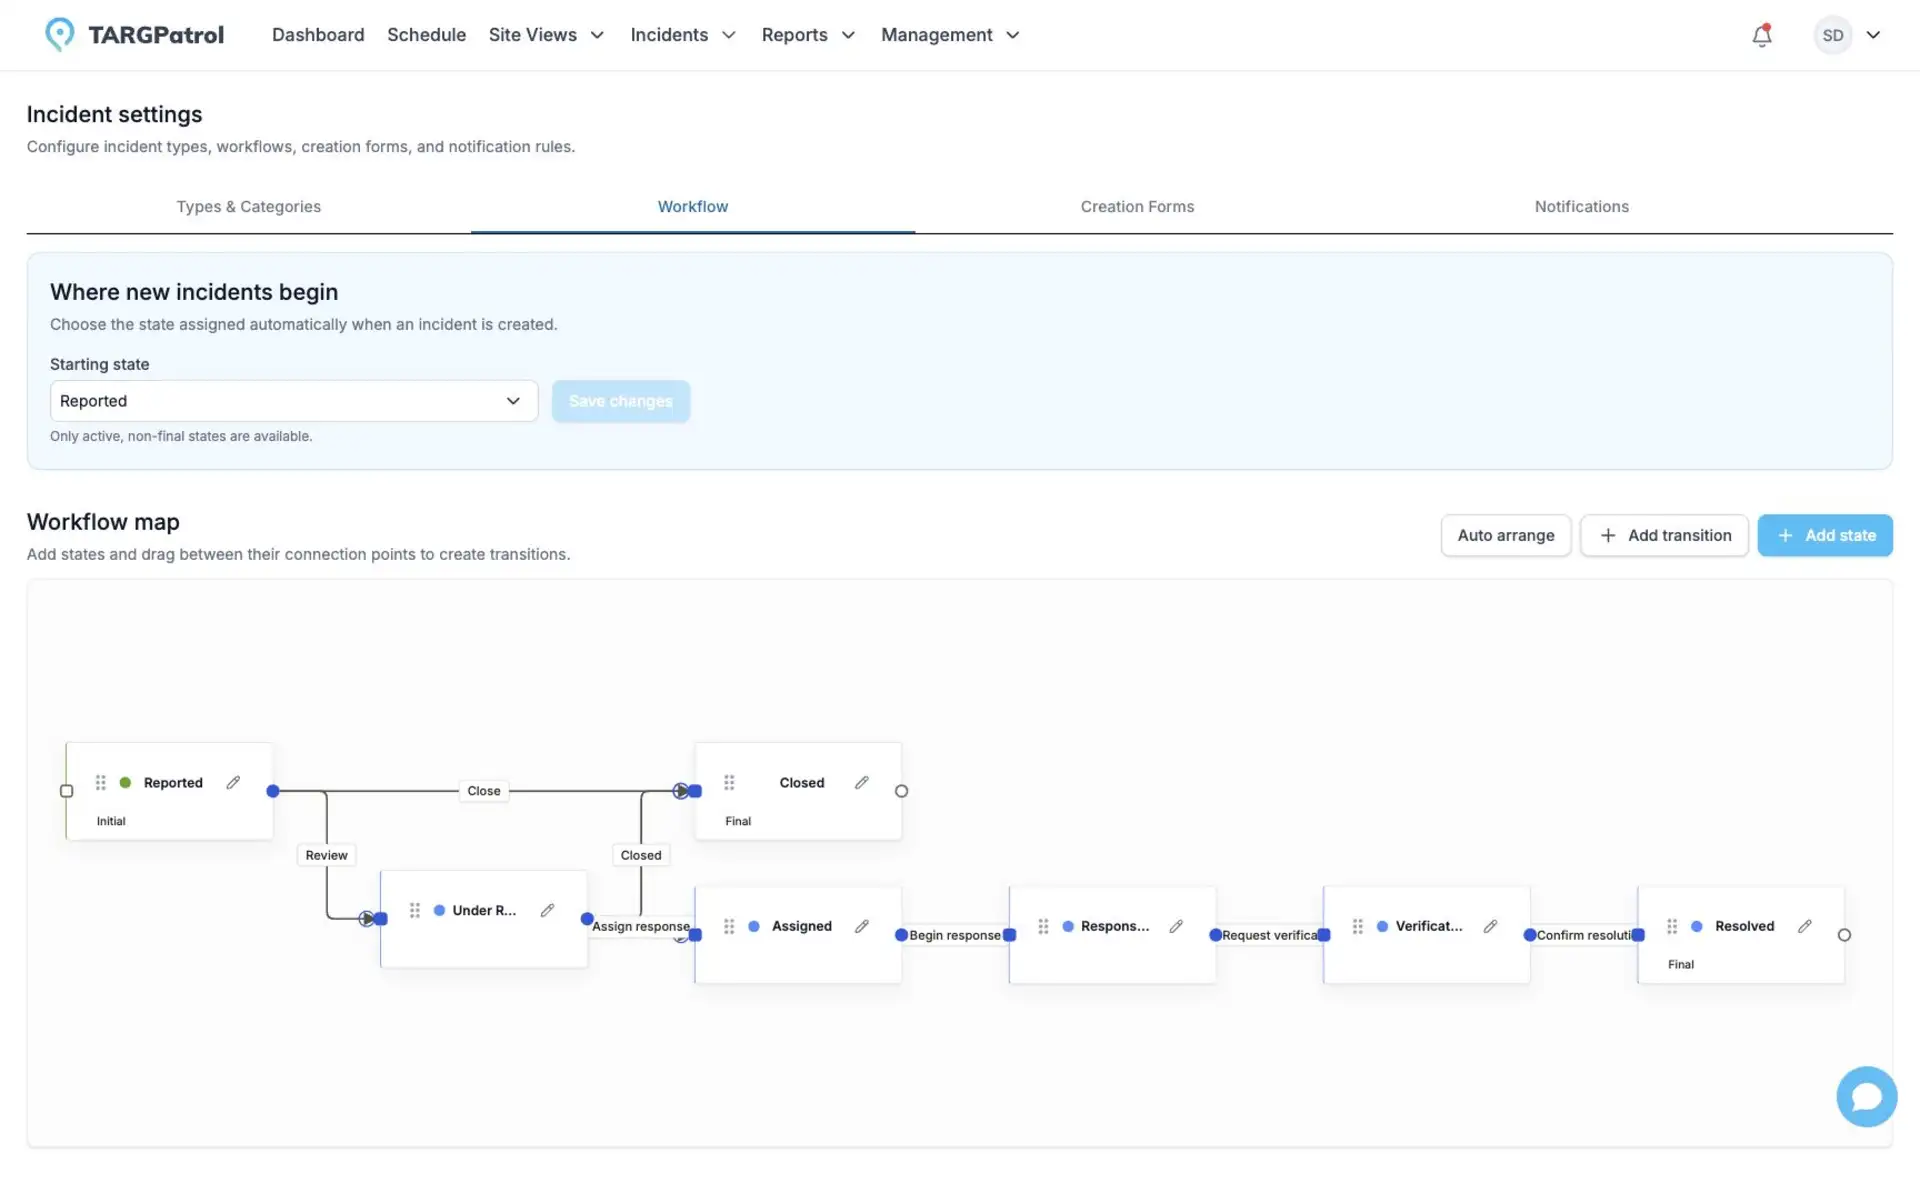
The workflow map makes each state and allowed transition visible at a glance.
See it in practice
A straightforward workflow might be New → In progress → Resolved, with an additional transition from New to Rejected. Managers can start work, while guards may only report and review the current status.
For the Resolve transition, you can require a note so the final outcome is always documented.
Good to know: a user only sees transitions available from the current state and allowed for their role. Location access and Incident permissions are checked as well.
Open the workflow
Open Management.
Select Incident settings.
Open Workflow.
The workflow map shows states and transitions together. Drag states to improve the layout; saved positions are restored when the page is opened again.
Add a state
Select Add state.
Enter a unique state name.
Choose a color used in the workflow and Incident views.
Select Final state if reaching this state completes the workflow.
Keep Active selected and save the state.
You can configure several final states, for example Resolved and Rejected. State names must be unique within the organization, ignoring letter case.
Choose the initial state
Select the state in which every new Incident must be created and save the change. The initial state must be active. TARGPatrol assigns it on the server whenever an Incident is created.
Add a transition
Select Add transition.
Choose different From state and To state values.
Enter a clear action name, such as Start review or Resolve.
Choose whether the transition is active.
Set the transition note mode.
Select the roles allowed to perform the transition.
Save the transition.
Transition note modes
Hidden: the user cannot enter a note.
Optional: the user can add a note.
Required: the transition cannot be completed without a note.
Role rules
Allowed roles are checked when a user changes an Incident state. The user must also have access to the Incident Location and the required Incident permission. Use the smallest role set that supports the operational process.
Archive workflow elements safely
Archiving prevents future use without rewriting history. Existing Incidents remain in an archived state until a user manually moves them through a valid transition to an active target state. A transition can only target an active state.
Workflow checklist
Exactly one active initial state is selected.
At least one final state exists.
Every normal state has a path toward a final state.
Allowed roles match real responsibilities.
Required notes are used only where an explanation is important.
With the basics in place, your team can spend less time deciding how to record an event and more time resolving it.
Related guides
Incident State Changes and History